Tag Archives: Drexel University

2019 Graduation Season

Much like last year, graduation season is a busy time! This year, two of my best friends walked with their diplomas in hand. Kelsea Arsenault, an amazing person who is basically my sister, finally graduated with her Bachelors in Film from UNLV. Jonathan Fabian, my roommate of five years and avid dog lover, graduated with his Bachelors in Biomedical Engineering from Drexel University. With Kelsea graduating in May, Jon graduating in June, and my graduate thesis starting up, I had my work cut out for me this year. While balancing my full-time job along with my school work, I had to make my special graduates cheesy tee-shirts to commemorate their achievements.

Kelsea’s Graduation

Austin and I were thrilled to fly home again. We’d been away from Las Vegas for so long. We missed our families and the unforgettable taste of a Double Double from In-N-Out Burger. For months Austin would turn to me and say, “I can’t wait to fly home.” It was a much-needed vacation for us. I was in the middle of a crazy spring term in school, and Austin was working extra hours to save for our move this summer. We couldn’t wait to spend a week in the Vegas heat celebrating Kelsea’s graduation and her 23rd birthday.
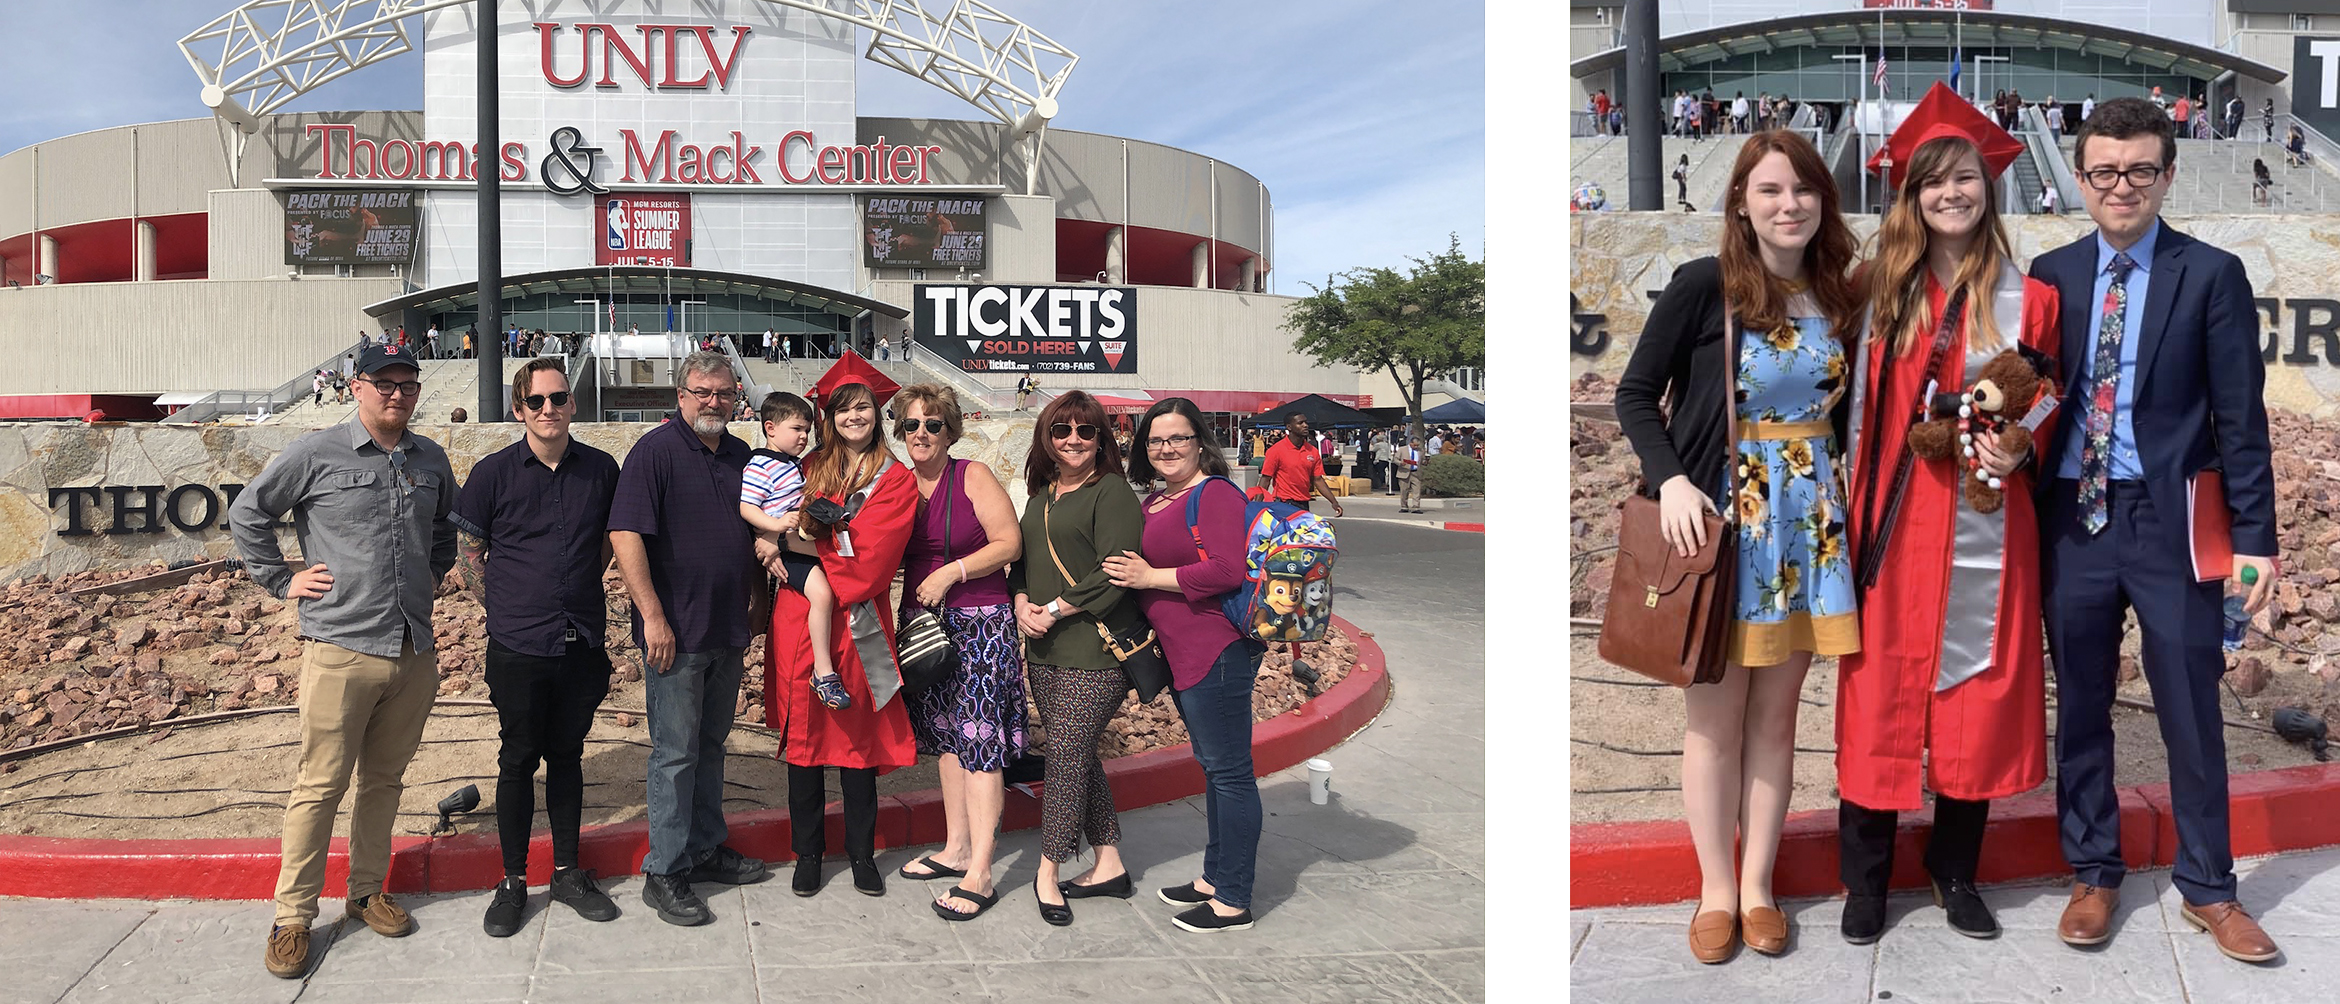
UNLV’s Commencement was held at the Thomas & Mack Center. That morning I tied Austin’s tie and watched Kelsea go through several outfit changes before we all climbed into our rental car. She tried on three olive green shirts that looked nearly identical before she settled on the winning blouse…that she then covered entirely with her red regalia. We were all so excited for her; I’m sure none of us were thinking very straight.

Kelsea separated from us and her family to prepare for the ceremony with her graduating class. We waddled through the crowd following her parents until we reached the arena. Arriving an hour early, we were able to find the perfect seats. Kelsea’s nephew crawled onto my lap, and we sat waiting to see our graduate walk!

Once her class started walking, we were all trying to get the perfect photo of her. We took some of her sitting down, the moment she walked across the stage and shook the president’s hand…and then we lost her. She completely disappeared—she wasn’t in her seat anymore! Our phones buzzed, and Kelsea’s brother leaned in to whisper, “She already left!” The group ran outside to see Kelsea standing there smiling. She didn’t want to stay for the whole ceremony, it was too long anyway. We all laughed.
Since my graduation last year, our friends have decided to make ‘graduation shirts’ a tradition. All this means is that Theresa spends a few weeks designing tee-shirts for everyone as a way of celebrating in the cheesiest way possible. It’s a labor of love though! After my rushed design last year, I’ve taken careful effort to make these shirts fun and specific to the person wearing them.

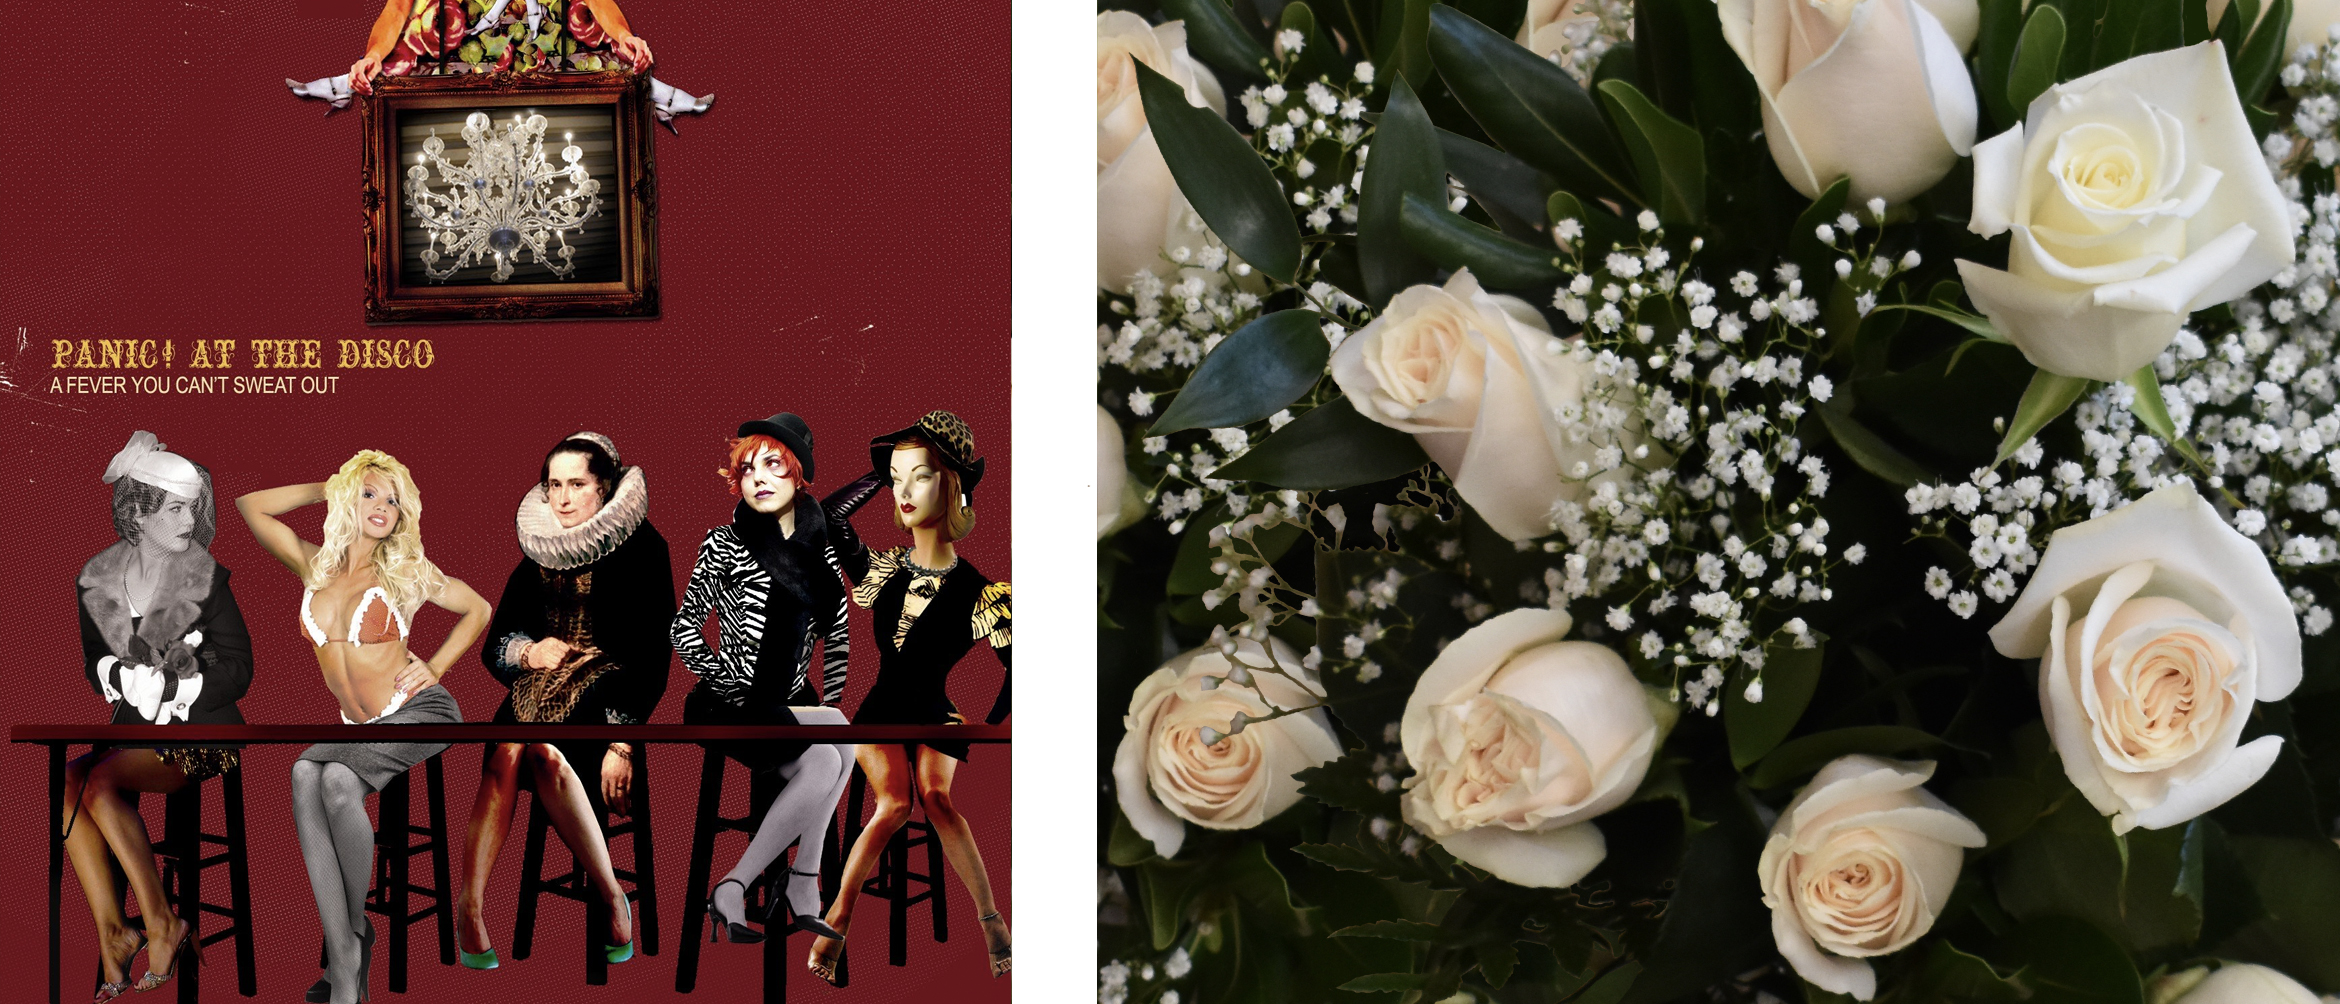
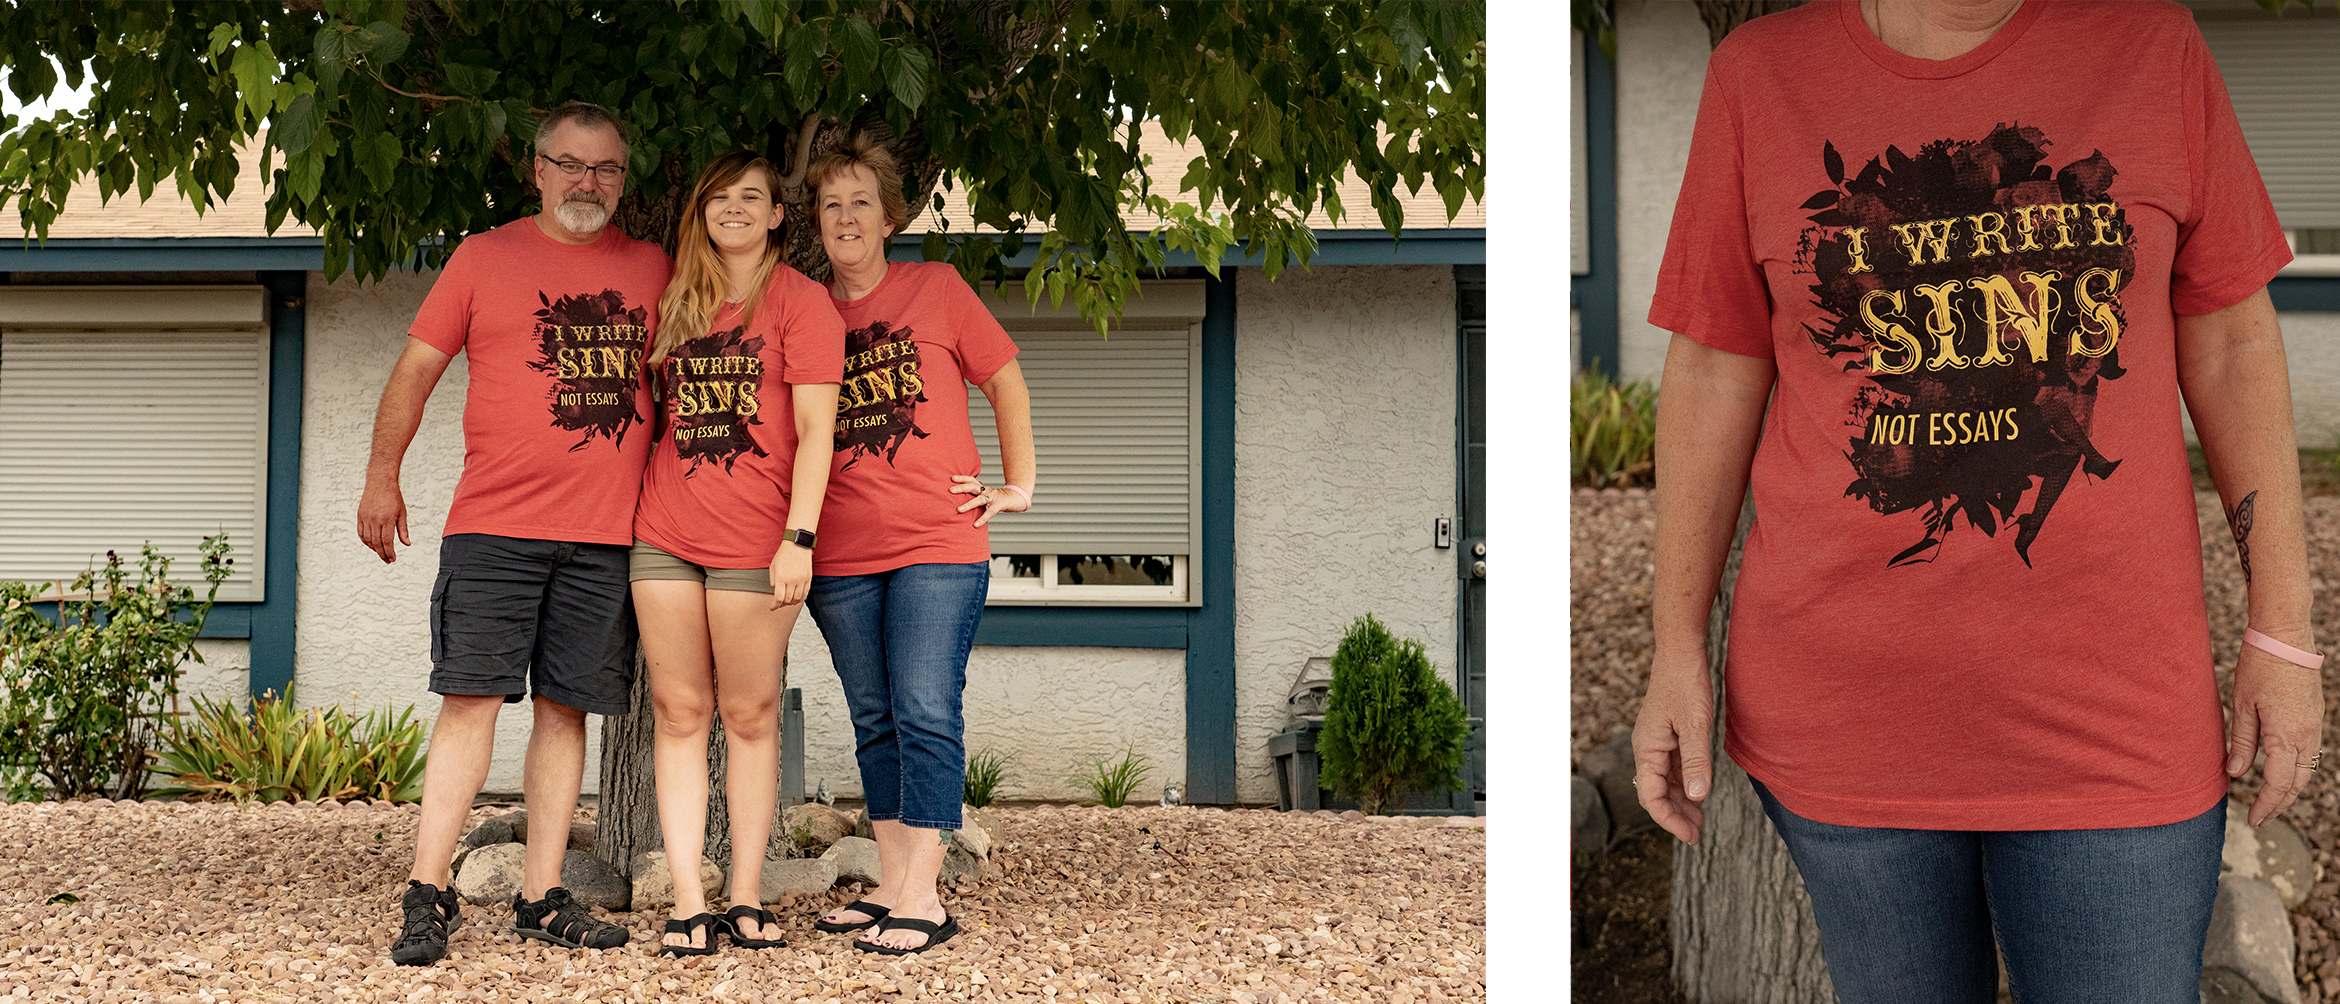
Kelsea’s shirt was inspired by Panic! At The Disco’s first album A Fever You Can’t Sweat Out. It was one of the first things we bonded over when we met in 6th grade, and she loves the album more today than she ever did in middle school. For a few days in April, we were batting around cringy sayings to go on the shirt. One night, Austin and I had come up with, “I Write Sins, Not Essays” after Panic! At The Disco’s 10th track, I Write Sins Not Tragedies. It was terrible and dorky and Kelsea immediately agreed.

Stylistically, there are a number of neat things going on within the album cover that I wanted to incorporate to the shirt design. I loved the vaudevillian aesthetic and it reminded me of the route I took for my undergraduate movie poster project. I used a half-tone effect on flower photos I’d taken in a flower shop while mixing legs in with the leaves. Kelsea felt legs were an iconic aspect in the album’s cover design. Personally, I thought it was cool they worked so well within the leaves. They didn’t stick out too much, but it was a cute nod to my inspiration. The shirt’s typography was directly influenced by the type from the album. I used an ornate typeface that resembled the type on the album cover and offset it with a lightweight sans-serif because I wanted to counteract its bold nature.

The shirt came out soft and lovely. Sure, it came in a few days late because the printer’s servers went down, but we still love the design all the same. It even worked out that the shirt was set in UNLV colors!
Jon’s Graduation

A few weeks after Kelsea walked with her diploma, it was Jon’s turn. It was so sweet: his parents and brother flew from California to support him. Austin and I were especially over the moon because we’d watched him perched at our dining room table for five years groaning at his computer as he pushed through lab write-ups and online quizzes.

The morning of his graduation, Austin and I picked up Dunkin Donuts. Jon was too excited to eat them. He wanted to make sure he had everything ready. I adjusted the hood on his regalia, and we left twenty minutes early to ease his nervous jitters. Much like at Kelsea’s graduation, Jon separated from us to join his graduating class and Austin and I found seats with Jon’s family.
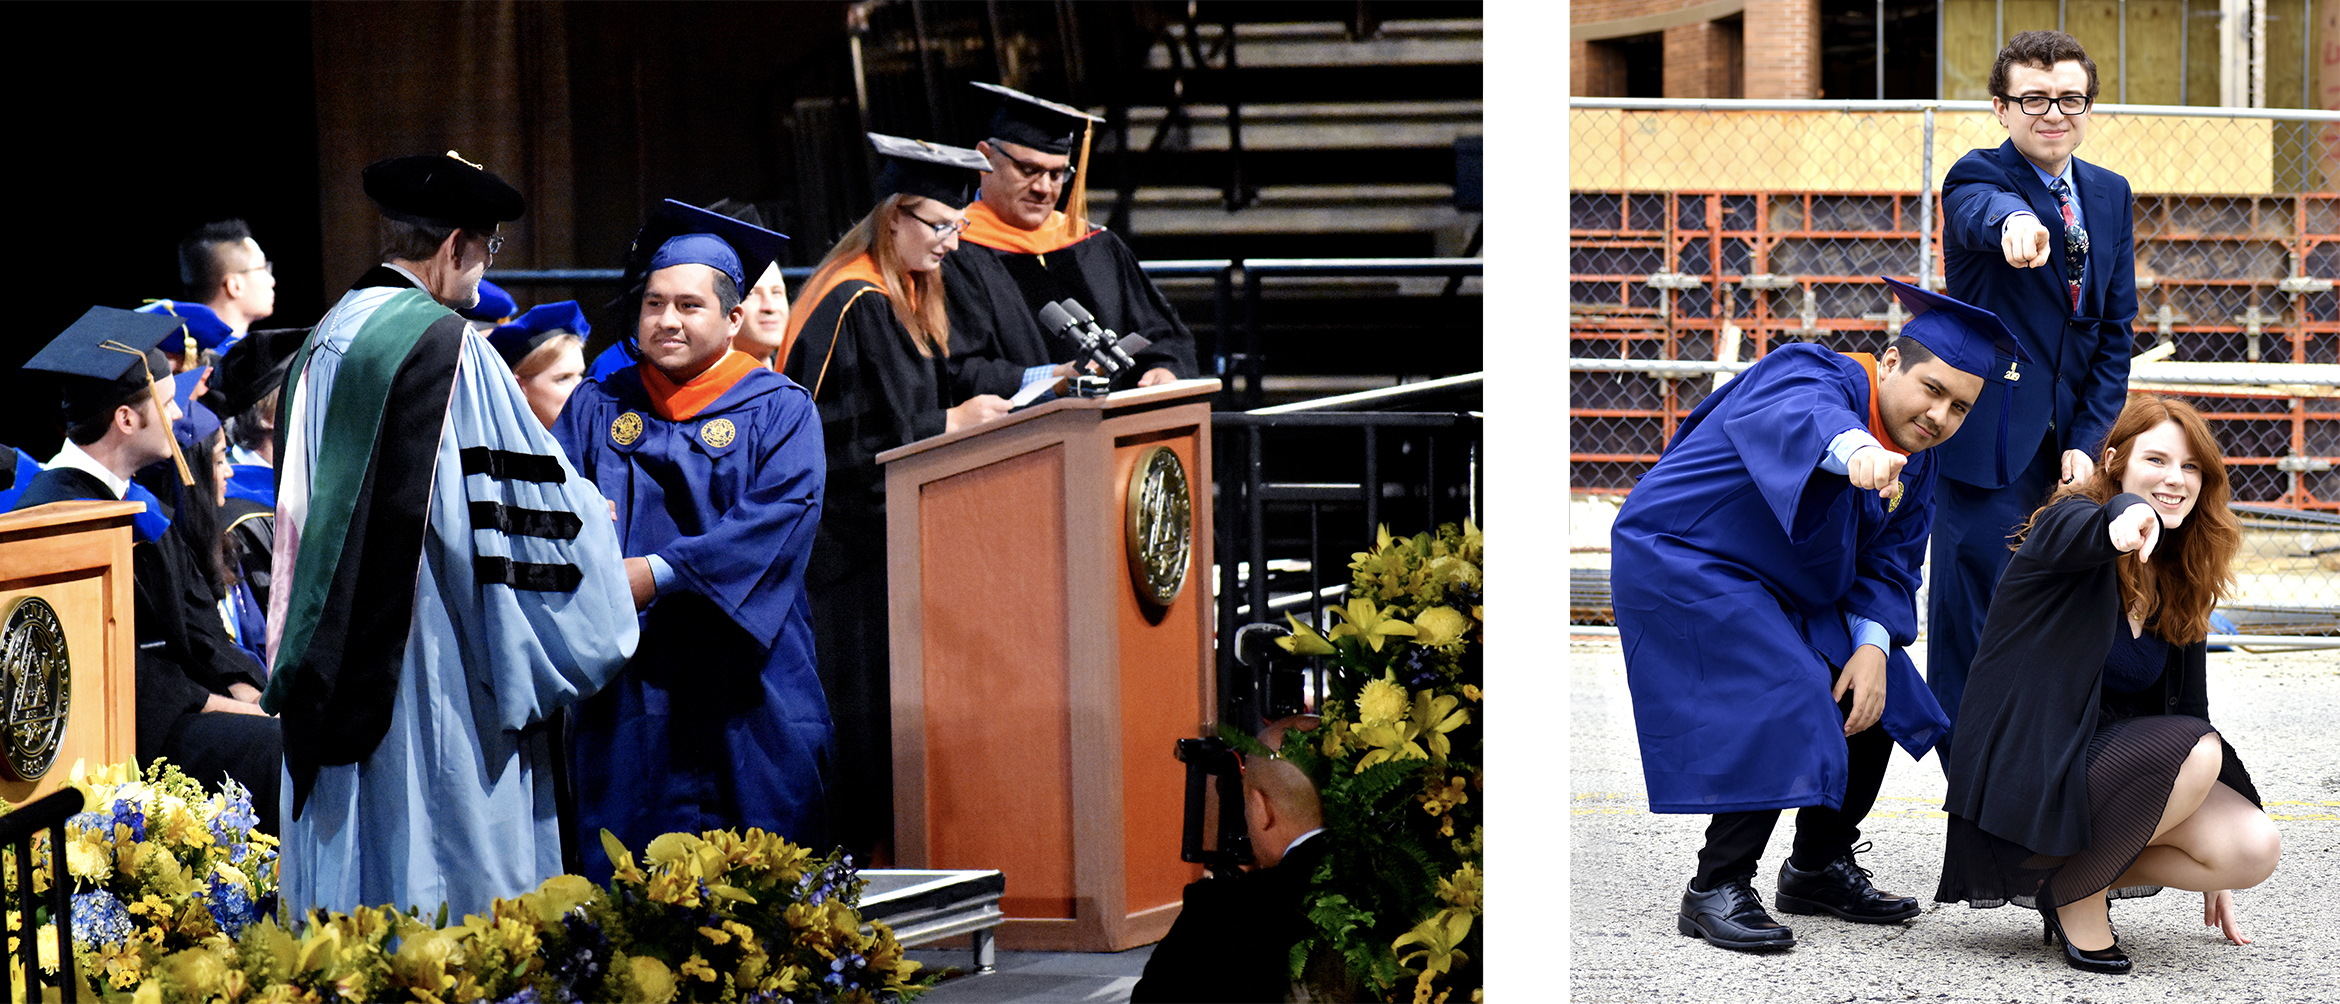
Jon graduated in Drexel’s gym, as I did a year ago. Austin and I sat in the same exact spot my friends and family sat for my graduation. I thought it was poetic, but Austin insisted it was the best spot to get a photo of Jon. Either way, it was so cool to watch the ceremony as a guest, rather then a member of the graduating class. The graduation for The School of Biomedical Engineering was much shorter than my Westphal College of Media Arts & Design last year. After we listened to the guest speaker talk about the advances she’s made in her field for breast cancer screening, Jon stood to cross the stage. He was beaming, and we were all so proud. We took a thousand photos and it was over before we knew it. He did it!
Jon’s shirt was the second I’d designed for graduation season since he’d graduate nearly a full month after Kelsea. His shirt was inspired by his personality, as well as funny things I’ve observed from him as his roommate of five years.

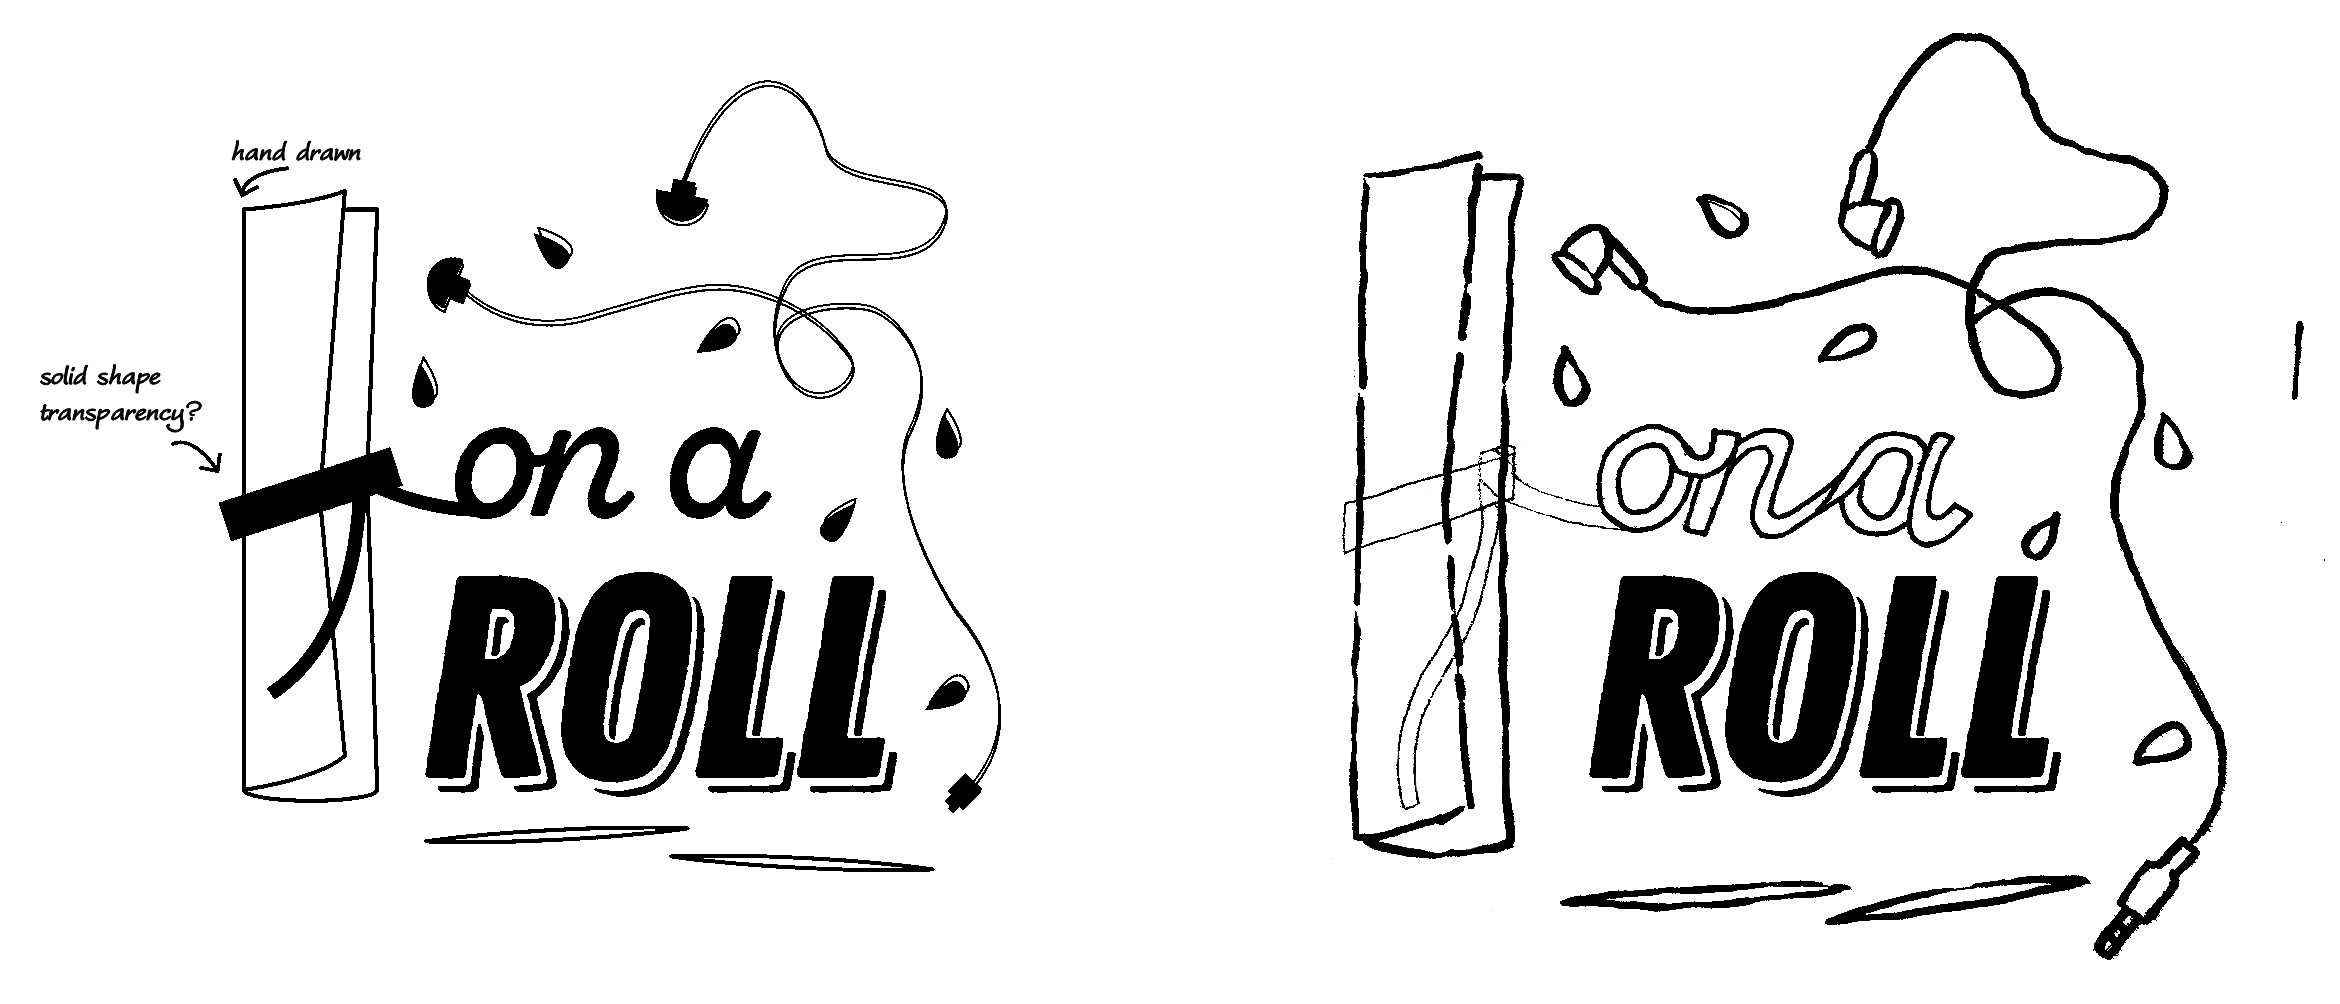
If there’s one thing you need to know about Jon, he’s always wearing headphones. He’s been that way since we first met freshman year — it also explains why he only hears every other thing I say. I knew I had to incorporate that, but it wasn’t enough to build a design fully. I wanted it to have a cute quote like Kelsea’s shirt.

Austin, Jon, and I all settled on, “On a Roll,” as his quote. It was a clever nod to his unique habit of rolling every paper that comes in contact with his hands, contrasted by the visual of a rolled diploma. Jon rolls his receipts, gum wrappers, napkins, drier sheets, etc. It was the distinguishing factor that made this design special to him.

After I’d settled on the direction, I started to add elements that further solidify what I lovingly call a ‘Jon Puddle.’ It’s usually what emerges next to his computer while he’s studying for a midterm. It consists of a rolled napkin, a few rogue pumpkin seeds, tangled headphones (though he’s recently switched to cordless), and a couple discarded toothpicks. He always cleans up once the dust settles, but a new pile emerges once finals approach.
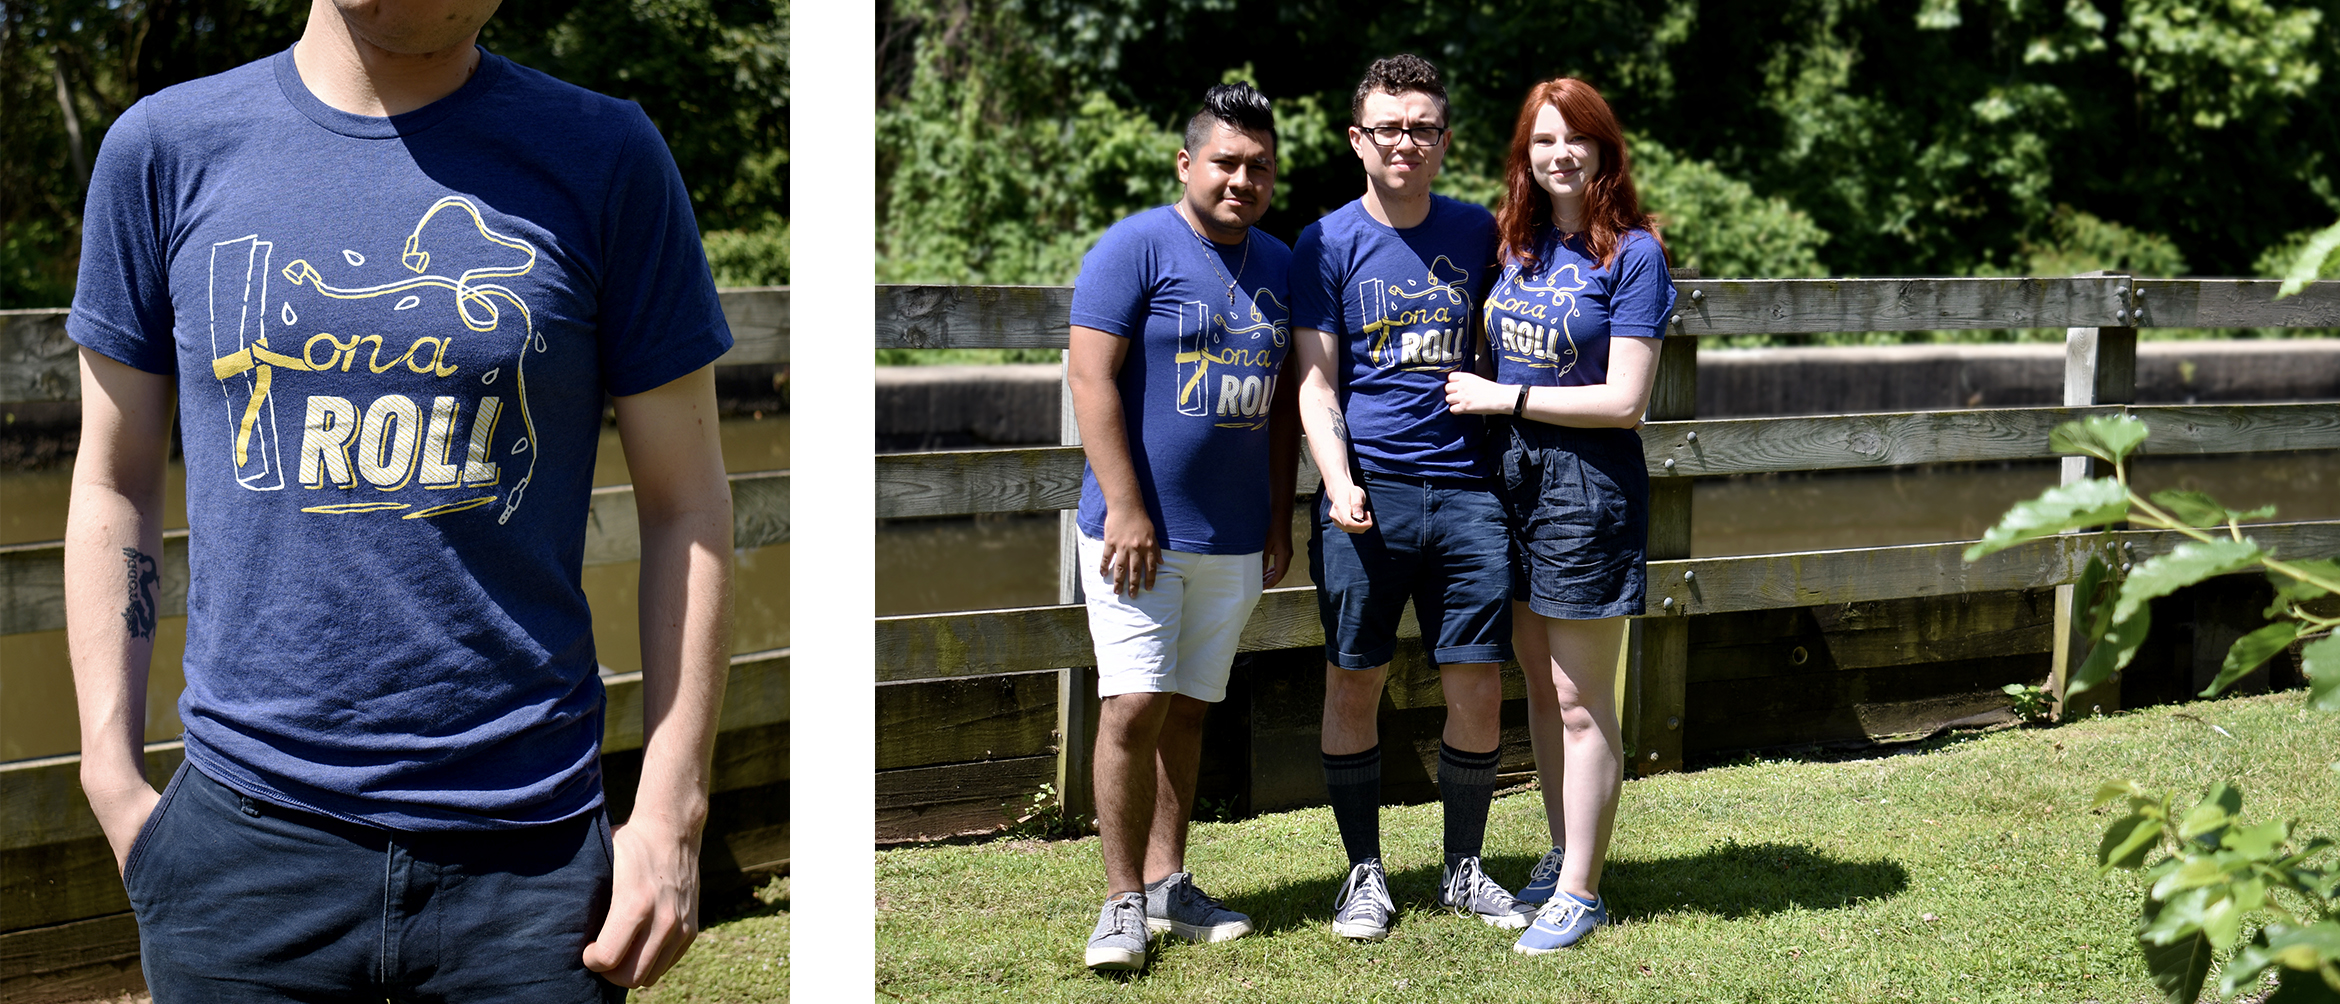
The color palette and execution of the design felt natural once I nailed my subject matter. Since Kelsea’s shirt had a palette that matched so seamlessly with her university’s branding, I wanted to do the same thing for Jon. I found a navy tri-blend shirt that was soft and blue enough to allude to Drexel University. From there, I sourced a white and goldenrod hue from the printer to ensure the colors appeared properly once the fabric was screen printed. I then started experimenting with line weight and illustrative styles to give the design a more ‘hand-made’ look. I wanted it to look sentimental and special rather than overly polished because the design is personal in nature. I referenced my stiff line drawing as a guide and transferred my drawing to Photoshop to merge my digital and illustrated typography.

In the end, I’m so happy with how my designs came out. I’m absolutely more proud of my friends’ monumental achievements, but these unique keepsakes are something we’ll hold close to our hearts for years to come. Not only that, but I’m thrilled that we’ll all have ample opportunities to wear matching outfits. We’ll be the coolest kids on the block with cheesy academic tee-shirts.

Paul Peck Gallery Exhibit

The Project Scope

My favorite course so far during my master’s degree has been my Exhibit Design class. When I was studying design during my undergraduate degree, I had taken an Environmental Graphic Design course that focused on exhibit design and placemaking. It was a lot of work, but I truly enjoyed it. Because the undergraduate course had such a heavy focus on design, we didn’t have the time to cover any of the logistics that go into getting the design approved and implemented, though. This master’s class gave me the opportunity to learn more about curating and storytelling—two things that were heavily lacking in my prior knowledge.

Over the course of the term, my class was tasked with an overarching project to design an exhibit about liberty. On week one, the scope seemed relatively simple. We’d define liberty, suggest a few works we felt connected to the theme, and we’d hang them in Drexel’s Paul Peck Gallery. By week seven, my class realized that the project was much more difficult than we had anticipated.

We all had different definitions of liberty, and each of us wanted to focus on a specific historic example. My professor was inspired by the American Revolution, while others of us were inspired by the Suffragettes and liberation on a global scale. The scope of the project was too wide, and we only had three weeks to finalize our pitch for the exhibit.

To fix this issue, our class was divided into two groups: 17–18th century, and 19th–21st century. Each group would have to create their own pitch for the space as the final project.

My group was tasked with designing an exhibit for the 17–18th centuries. We were given a few weeks to complete the project, meaning that we had to decide on our narrative, pick our pieces, write copy, and create a cohesive identity for the exhibit. The only thing we were given, was that both exhibits would be titled, “Art & The Concept of Liberty.” It was a tall order, but there were seven of us working on the project, so it felt feasible. We had five writers, an editor, and I acted as the designer. We weren’t given a budget for the project, so all existing pieces of art were considered fair game. The goal was to pitch an exhibit that could be edited to work for Drexel at a later date.

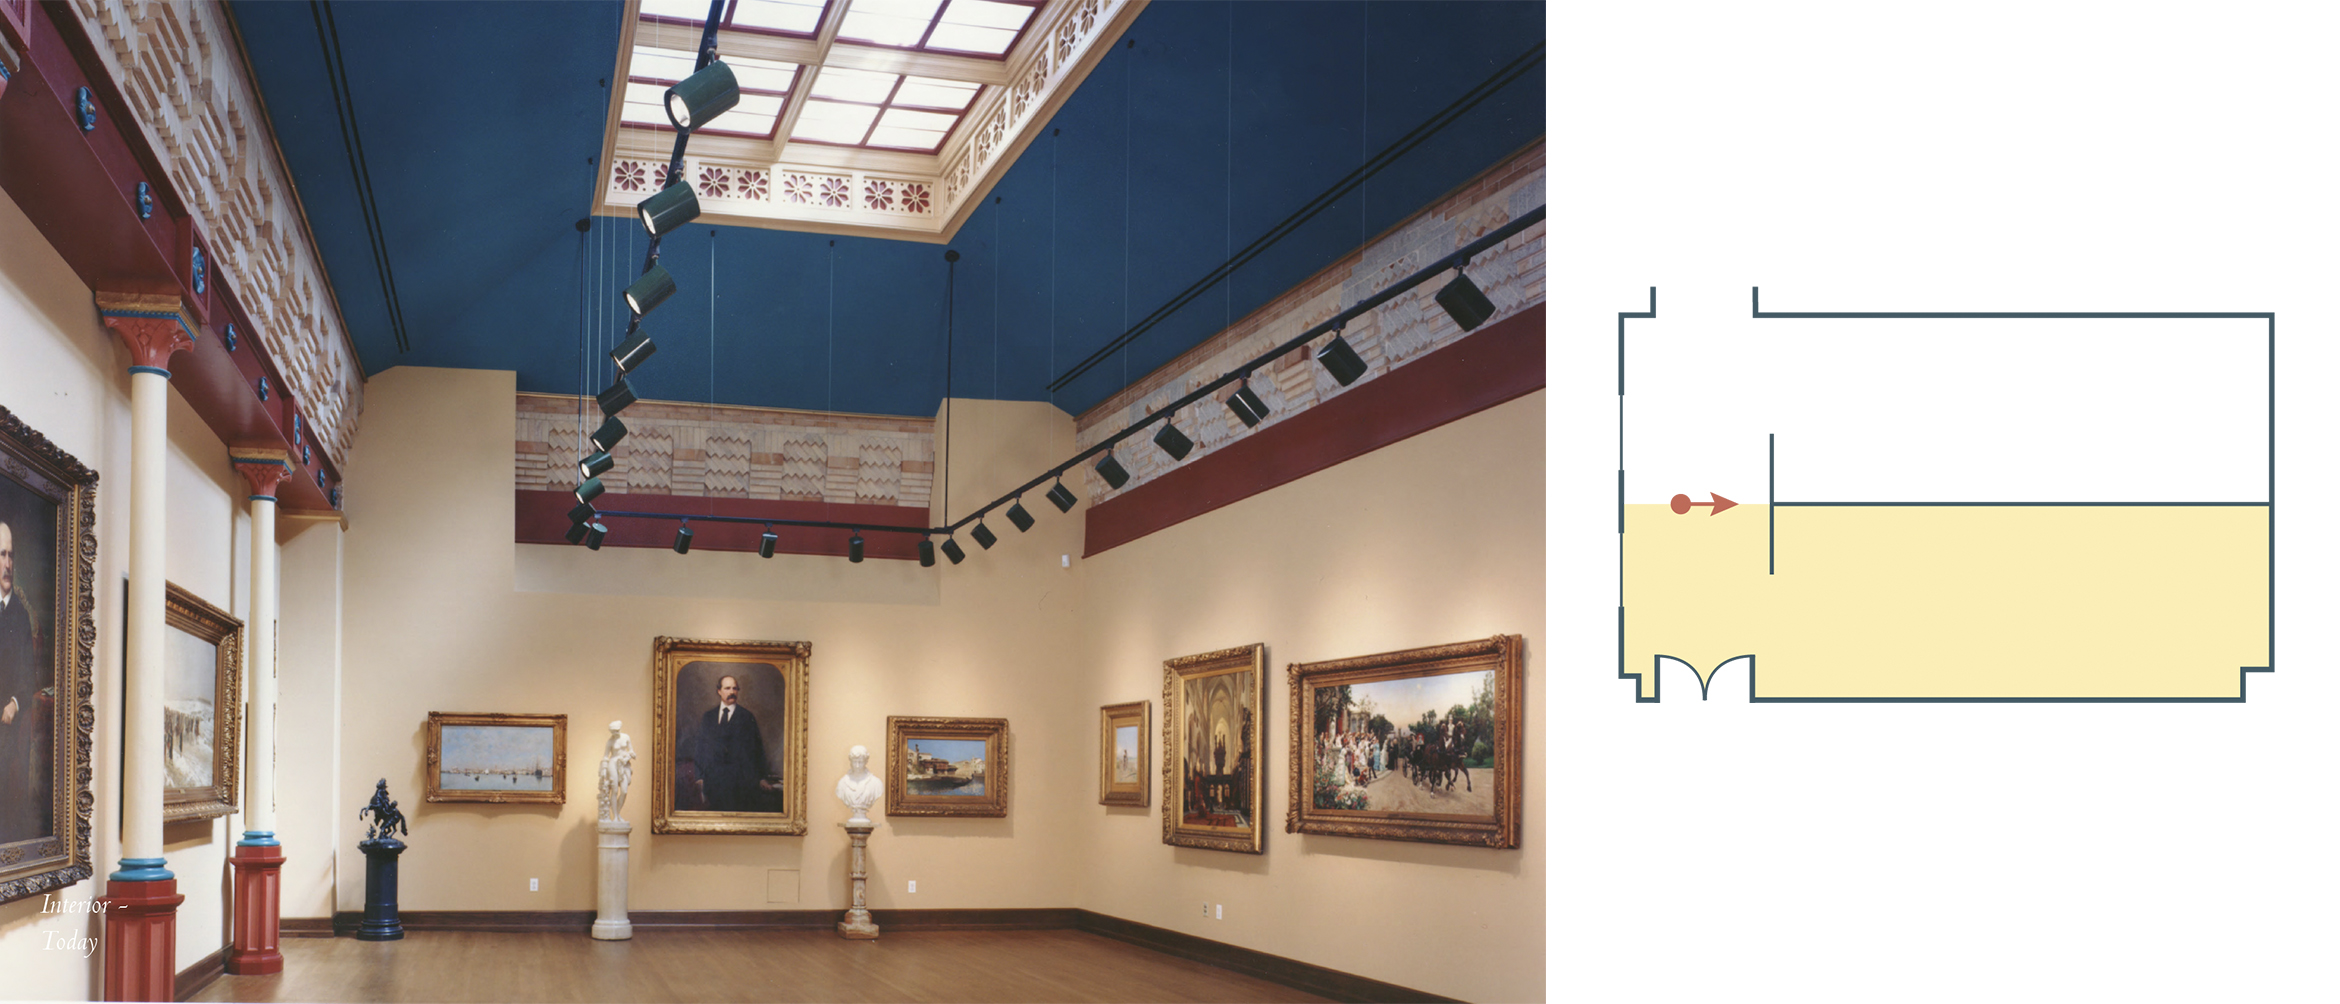
Drexel University's Paul Peck Gallery

We started the lengthy process by taking a long list of possible art pieces and categorizing them. We wanted to be very abstract with how we classified them as an effort to make the exhibit less controversial. Because everyone has a different concept of liberty, we didn’t want to place the art in a restricted metaphorical box that would only fuel argument. We settled on: Dreams Of Liberty, Agents Of Liberty, Fighting For Liberty, and Symbols Of Liberty (specifically in that order). These categories worked as a loose narrative for us. People dream of freedom, key agents fight for it, and once it’s achieved, we respect the symbols that represent freedom, and those who gave their lives for us to have it. From here, we narrowed our selection down to a few key pieces for each category, and our writers started to generate copy for the narrative that would be displayed among the chosen work.

As the writers and editor got to work on the copy, I decided to visit Drexel’s Paul Peck Gallery and work with its blueprints to fully understand our design options. I was given very little information, but there were a few things I knew. The gallery was small, and we had exactly half of the space to work with. Both groups were told we had to share the room, so I needed to figure out how the space should flow, and were I wanted to place the front. I knew that the Paul Peck Gallery could not be painted, and that temporary walls were used to hang temporary pieces, as well. These restrictions informed a lot of my design decisions.

Interactive Exhibit Entrance Facade

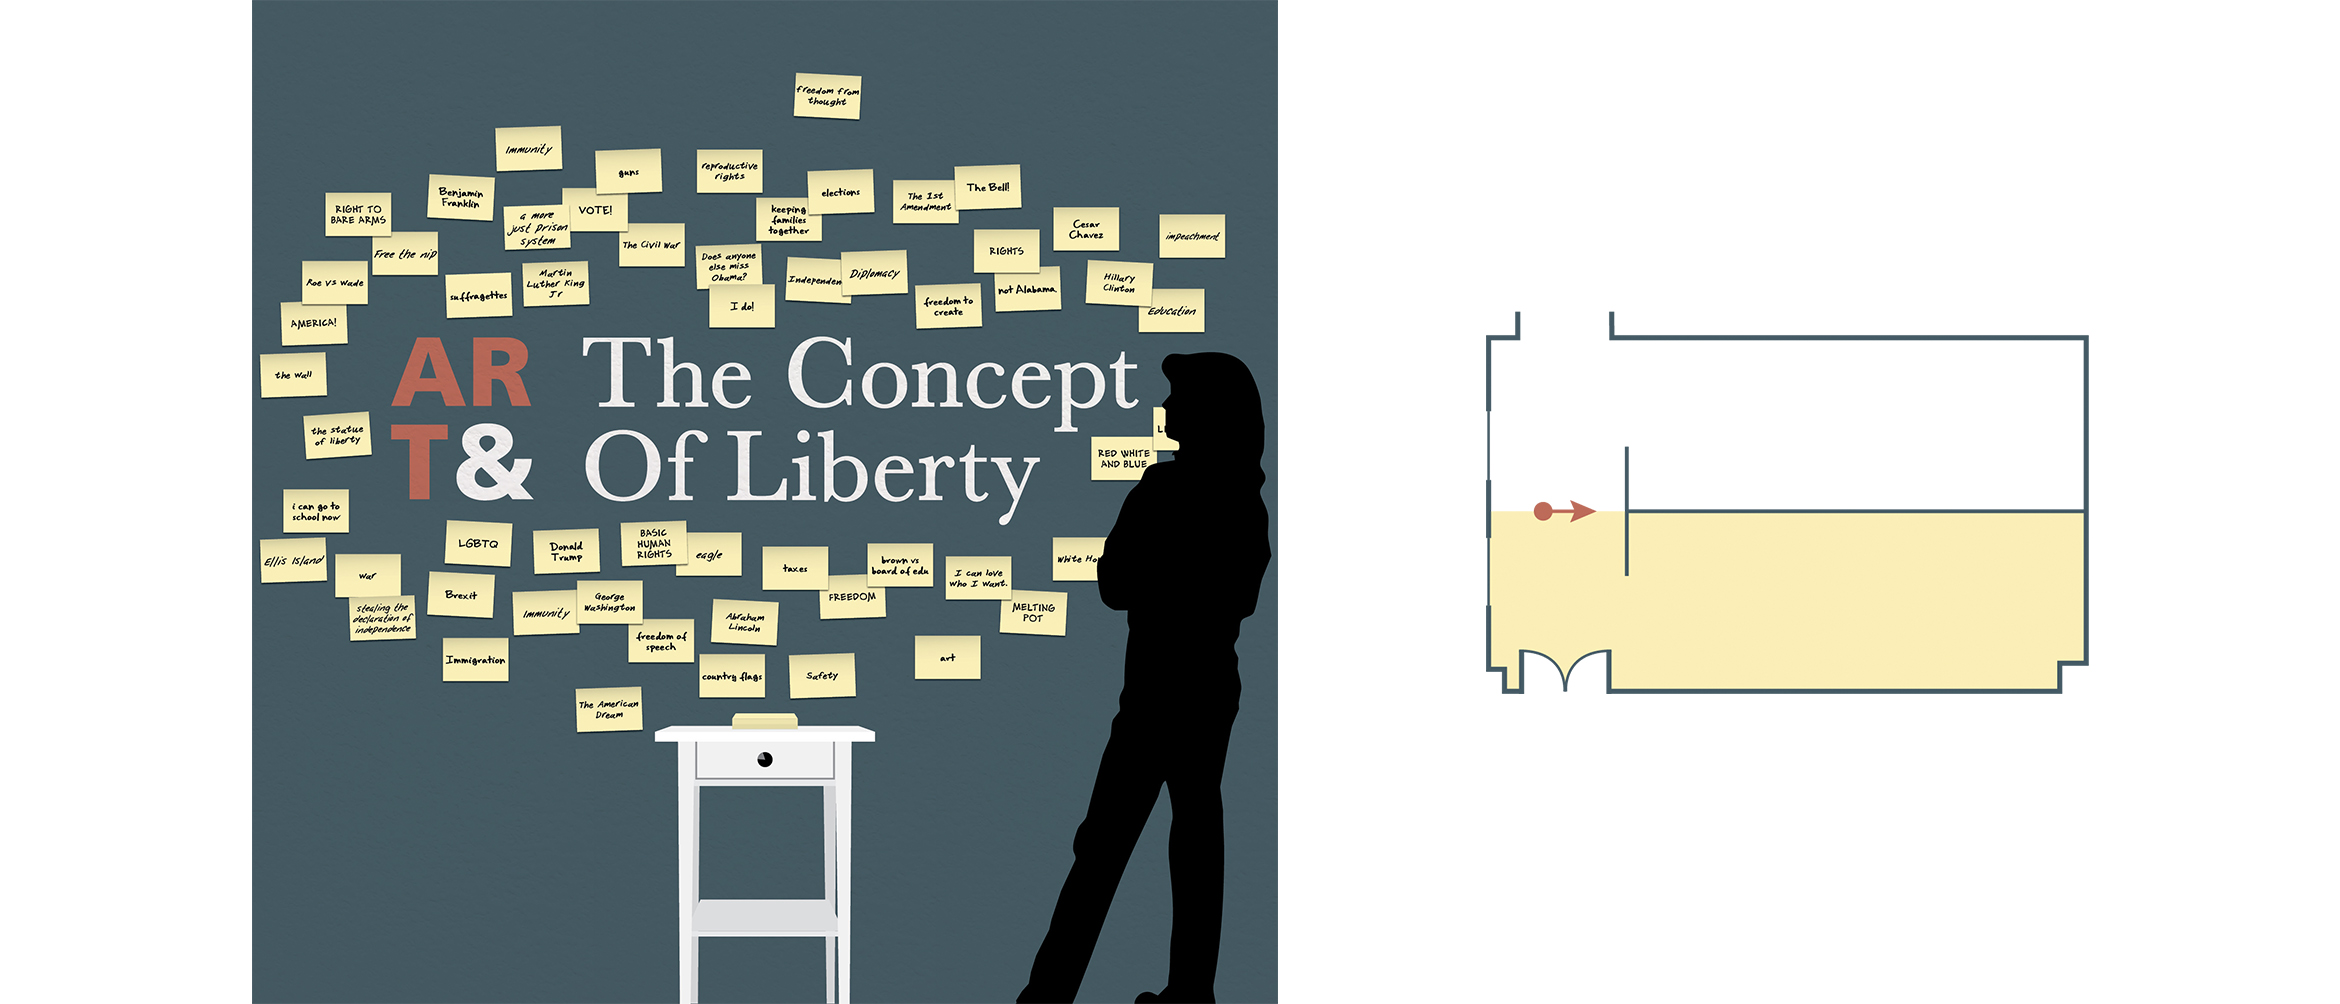
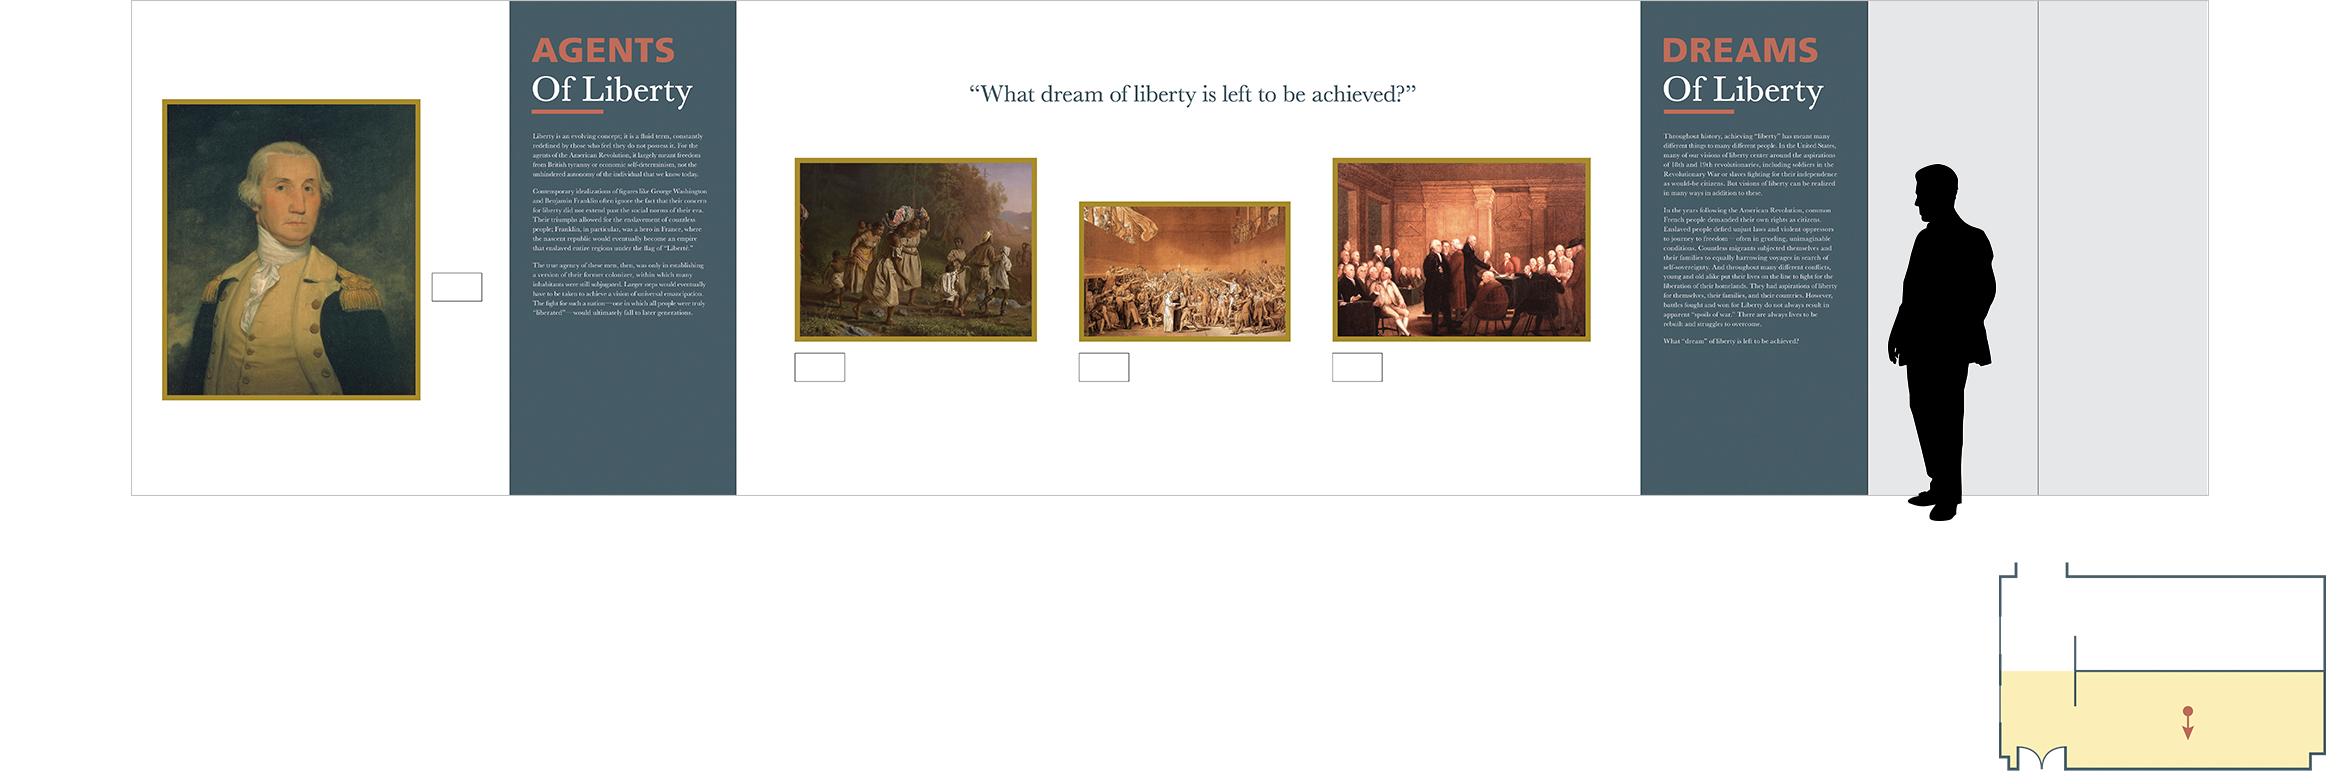
I was recently inspired by a speech I’d heard from Nina Simon, who expressed the importance of connecting and interacting with your audience when you build an exhibit. Still running off the high I got listening to her talk, I was inspired to add an interactive element to the space. This also influenced the way I divided the room. Because the Paul Peck Gallery uses temporary walls, I thought we could bisect the room laterally two walls creating a ‘T’ shape. This would give us a front end to the exhibit that would put the ‘Dreams Of Liberty’ section directly in our visitors’ sight lines. Once I settled on a typographic mark for our exhibit’s name, I brainstormed interactive solutions for the front end of the exhibit.

I kept thinking back to the fact that each student in my class had a different concept of liberty that was directly related to who they were and what their experiences were as an individual. My class isn’t an anomoly, however. Everyone has their own perception of what liberty and freedom is. What if we gave them a space to share their thoughts and start a larger conversation? After all, it’s what we’d been doing all term!

The front of the exhibit is a large temporary wall covered in a muted teal vinyl adhesive. This solution doesn’t damage the wall, but still gives our exhibit a pop of color. The wall would have a small desk placed in front of it that compliments the room’s original architecture. A 6×4″ pad of sticky notes and a marker will sit atop the desk, with extras inside its drawer. Each person will be prompted with the question, “What does liberty mean to you?” though not everyone will agree with all the answers placed on the wall, they will be aware of their communities thoughts and encouraged to have a larger conversation.

Exhibit South Wall
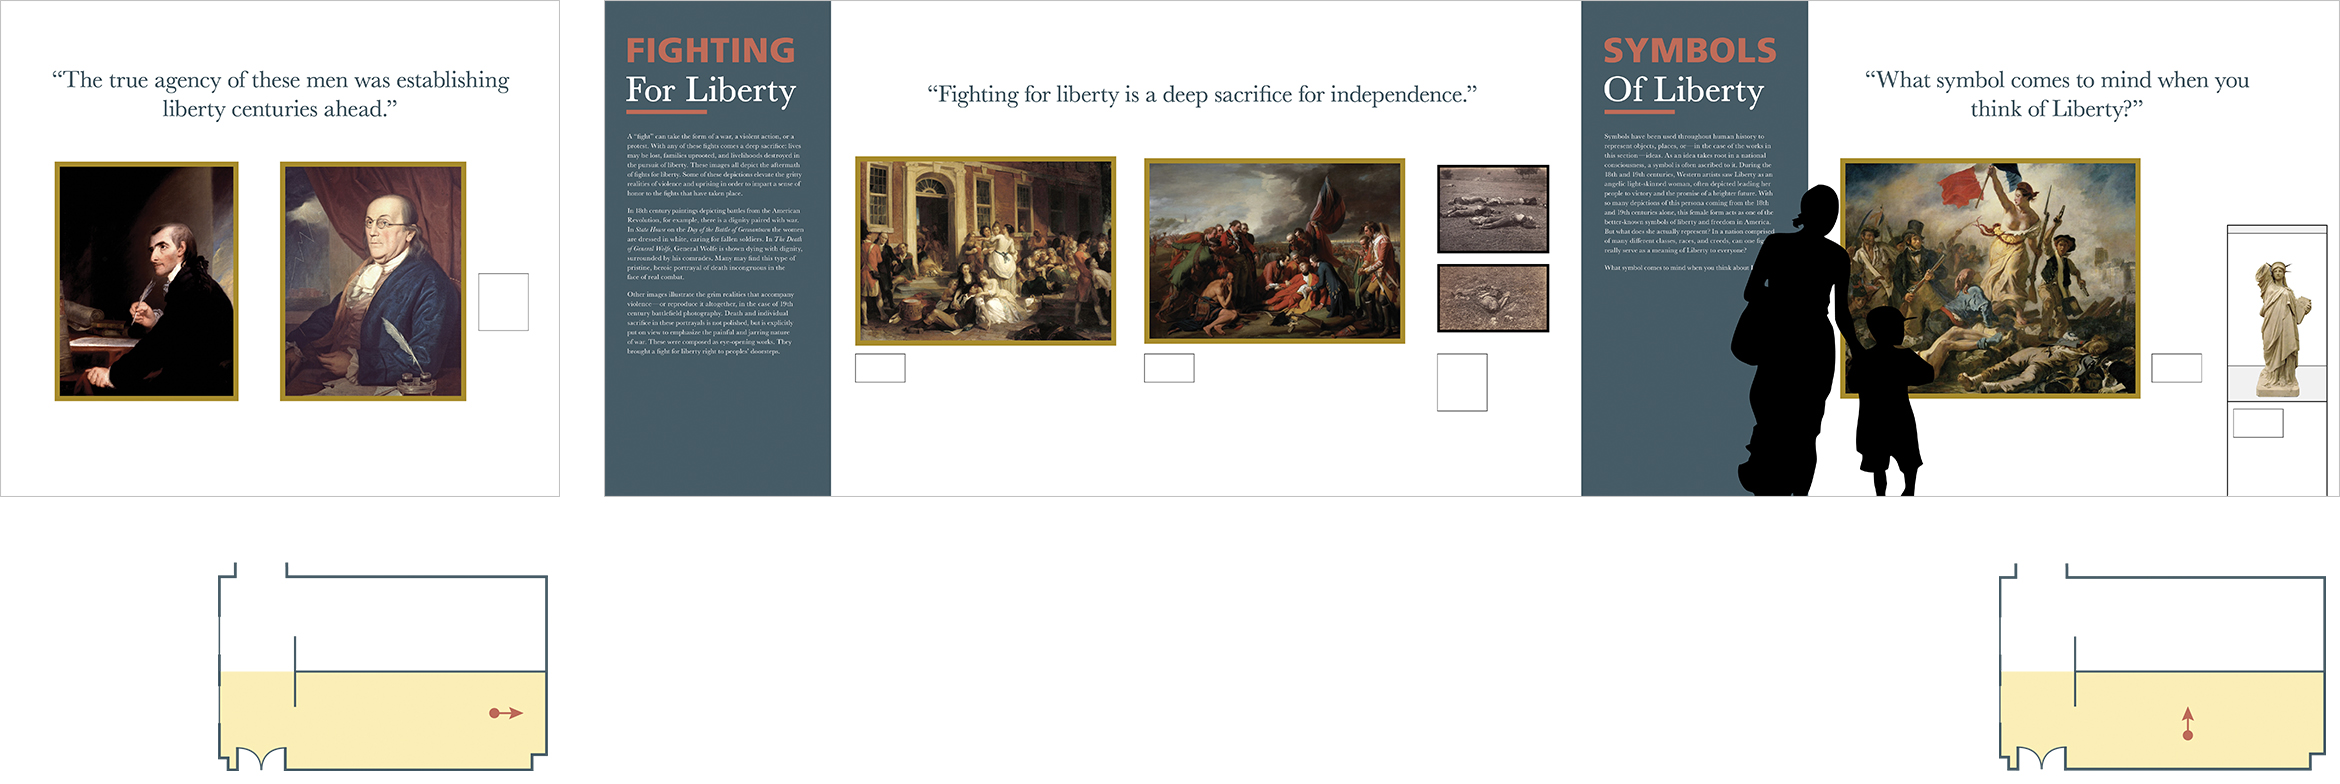
Exhibit East Wall (left), Exhibit North Wall (right)

Each section of the exhibit was separated by vinyl wall decals that extend the full height of the temporary walls. Once our writers finished creating content that tells the narrative of the story, our editor worked to put everything in one cohesive voice. I typeset the copy on the information panels and designed how they’d integrate within the space. It was important to communicate the narrative before looking at the pieces included, so I decided to treat them as section dividers. To break up the space and add further visual interest, I included vinyl die-cut quotes that were placed above the pieces. Some were thought-provoking quotes, and others were questions that could influence the conversation at the front of the exhibit on the interactive wall.

The Visual Identity

As I mentioned before, working with several restrictions influenced my design solutions greatly. My color palette was immediately taken from the colors already existing in the space. I didn’t want to use colors that weren’t appropriate for the pieces we included, and luckily for us, they shared common hues with Drexel’s Paul Peck Gallery. Due to this restriction, I worked to find other ways to add visual variation to our exhibit. I felt that typography was a great way to accomplish this.

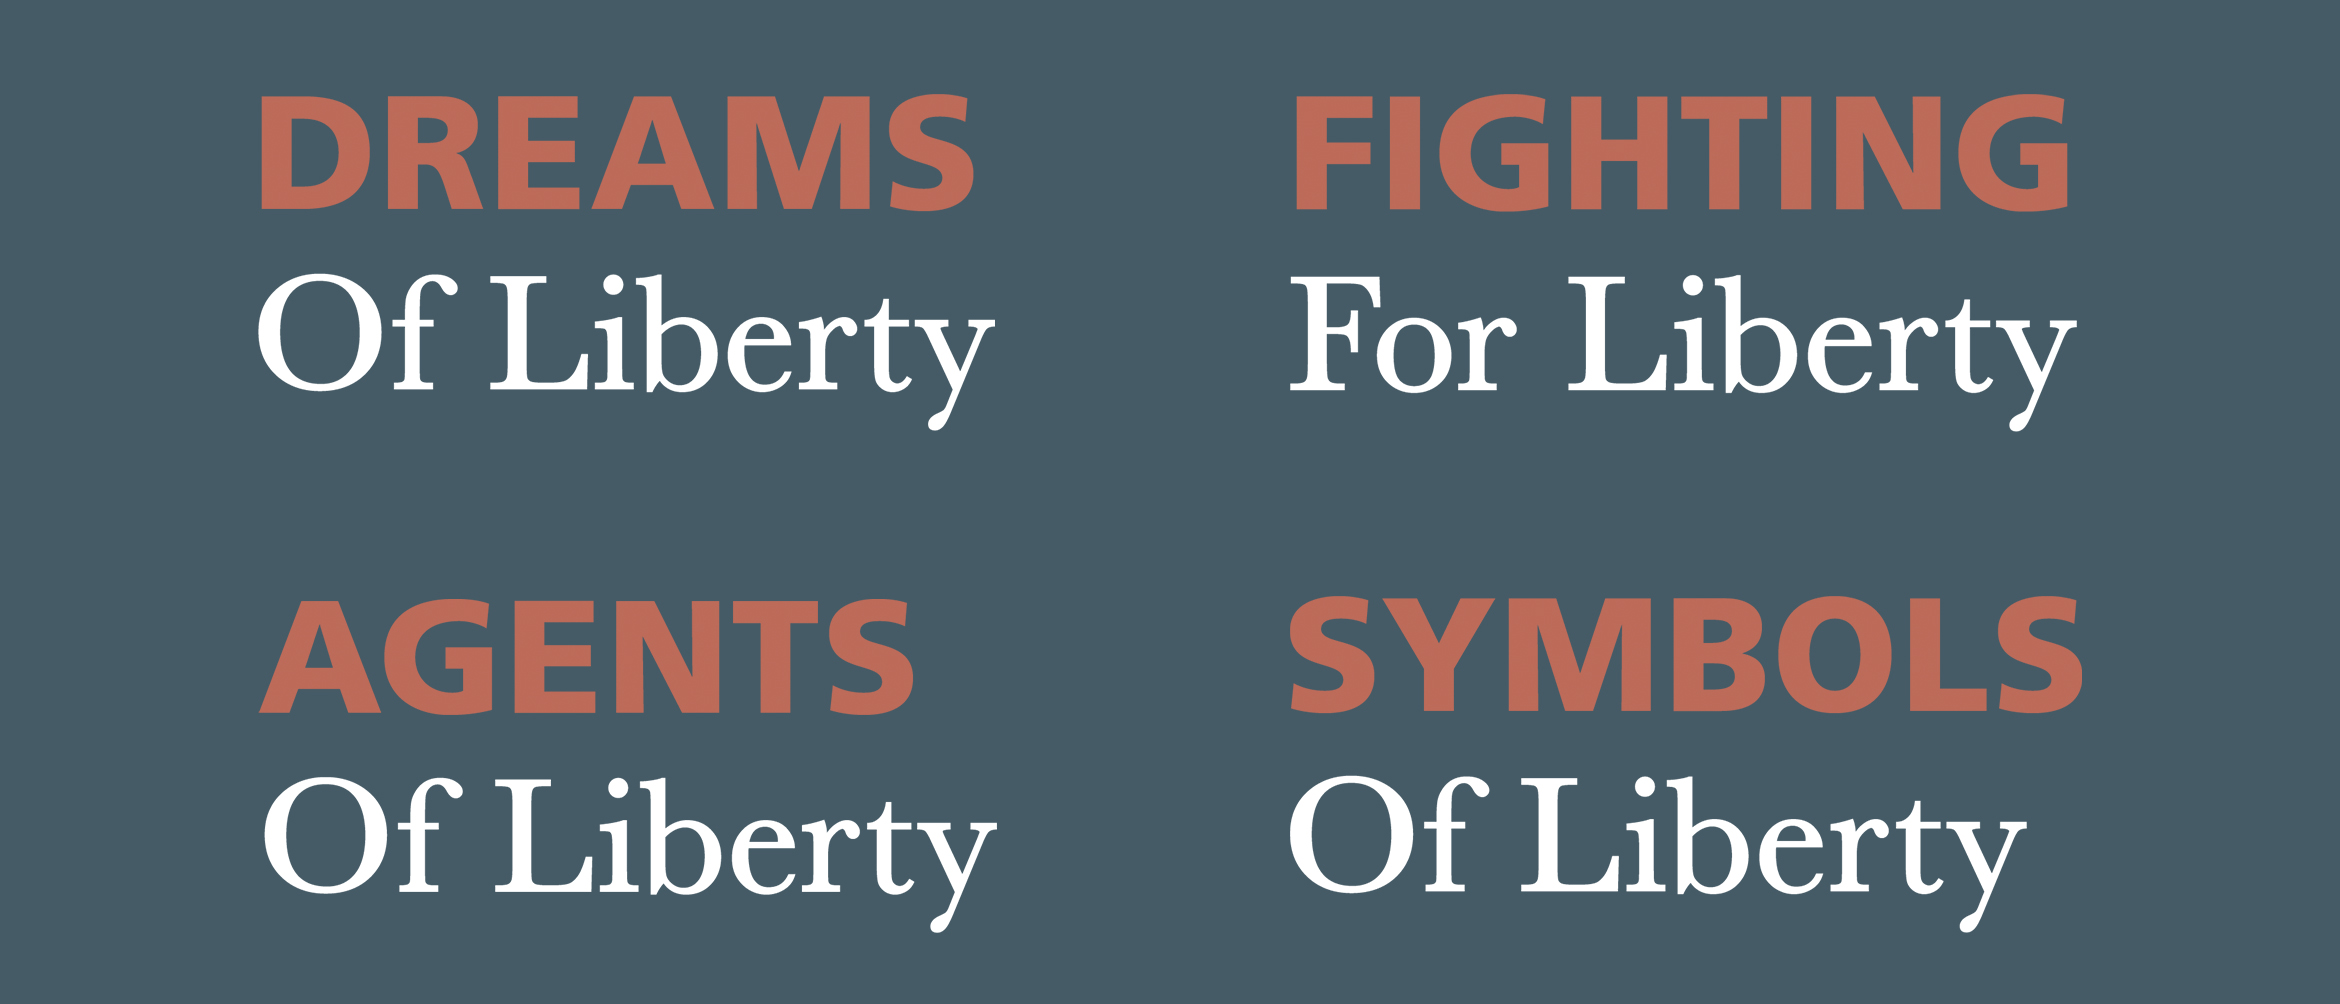
In the exhibit, we focus on key events and figures like America’s liberation from Brittan, and our founding fathers. Though the writing we included for the narrative had more of a contemporary feel, I was itching to use Baskerville. How could I not?! The typeface invented by John Baskerville and embraced by Benjamin Franklin had to be featured in an exhibit celebrating liberty in America.

I did want to offset it with a more modern sans-serif typeface, though. The classical nature of Baskerville is absolutely lovely, but I worried about making the exhibit look dated to a certain extent. To offset this, I combined it with Frutiger. Because Frutiger is commonly used in the signage and wayfinding in airports and train stations, I consider it to be the official typeface of transportation. I thought it worked as a visual metaphor—speaking to America’s journey to a liberated future. Its geometric nature also compliments the delicate, friendly letterforms in Baskerville; ultimately, modernizing the typography.

Section Title Typesetting
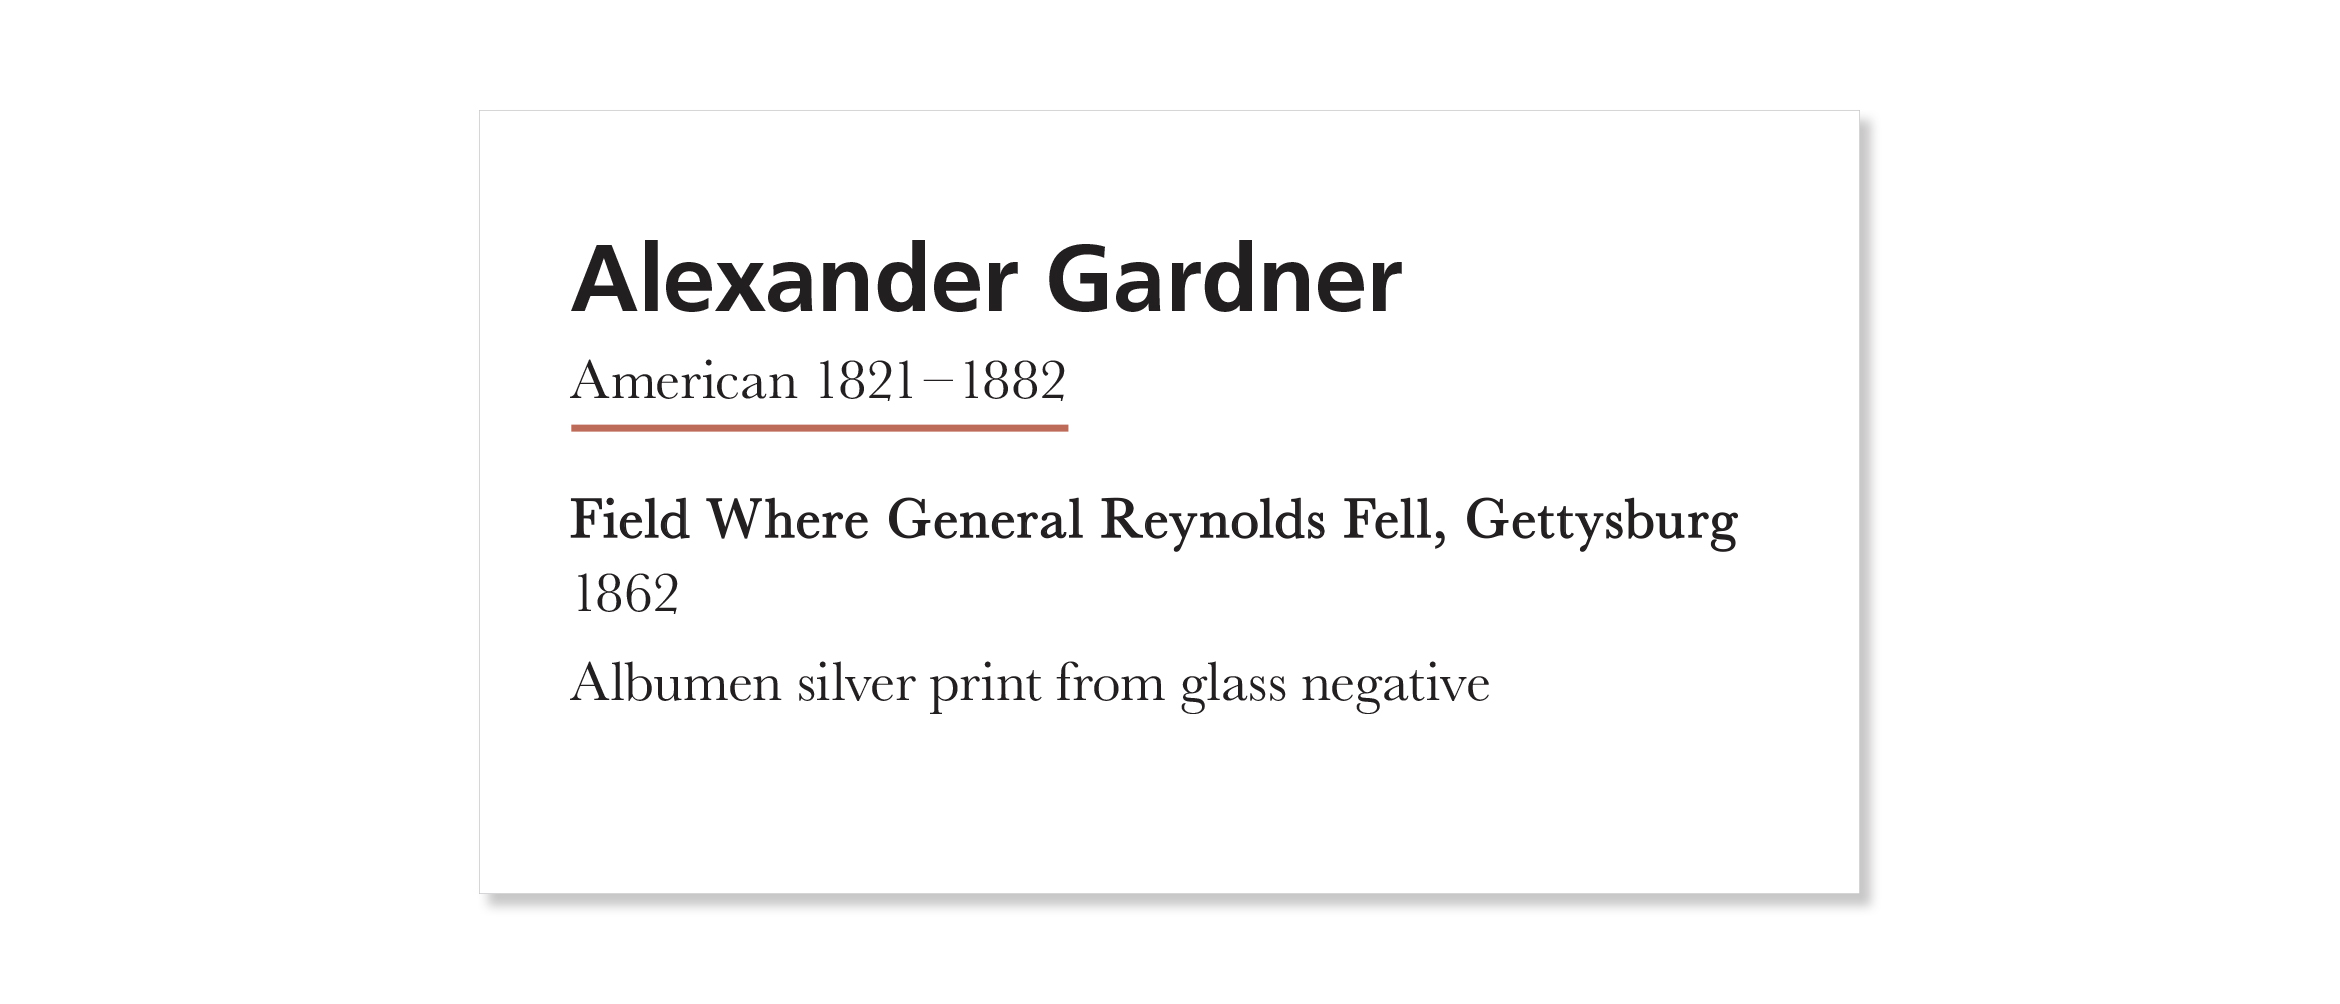
Example of Exhibit Label, 6.7 x 3.8"

Though we didn’t have a lot of time to put our pitch together, I was proud of what we were able to accomplish. My knowledge from my undergraduate course on Environmental Graphic Design influenced my approach to this project greatly. I feel that it gave me the tools I needed to create a holistic final design that incorporated individual aspects of both courses. Moreover, I loved that I didn’t work with designers on this project. In my undergraduate course, it was so fun to hear the perspectives of other designers and watch our project elevate visually. In my graduate class, the process was different. It was rather interesting because my team’s primary focus was on the content. They were more concerned with the curating and logistics of the project than they were about any color decisions I made—let alone the typeface I chose. It required me to adapt to a team dynamic I’m not used to, and it gave me a different perspective as I moved through the design process.

Starting My Master’s

Whenever someone talks about graduating, it’s always followed by a flood of emotions, uncertainty, and excitement – as well as a sense of achievement. For the most part, I was no different. I looked forward to it from the start of my senior year. Saying I was excited was the understatement of the century. In June, I’d finally finish a degree that took me four straight years of hard work, late nights, and SO MUCH PAPER. Not to mention, I’d also be sharing the moment with the friends and family I had to leave for University. That being said, I lacked that nervous uncertainty that comes with this monumental achievement.

In April, I was accepted into Drexel’s Arts Administration Master’s Program. After a short summer off, I already knew what I’d be doing for the next fifteen months – I’d be earning my Master’s. Out of everyone in my graduating class, very few had made the decision to pursue their Master’s so early. For me, I knew it was something I’d always wanted to do. Yes, it’s a little early, but because of my financial situation, it made sense. Not only that, but most of my mentors expressed some sort of interest in having a Master’s degree. They just struggled with the hurdles that arise when you go back to school. They have families and careers. It’s hard to add night classes to their regimen and expect them to balance it all effortlessly.

Toward the end of my senior year, I often worried and second-guessed my decision to continue with school. I kept thinking, “There has to be a reason no one else is doing this. What am I NOT seeing?”

It took me a long time to come to terms with the fact that we’re all different. This morning, I just found out one of my classmates decided to randomly move to California! I didn’t know she was thinking about making that change. It certainly isn’t the right one for me, but it may be for her. It’s always been my dream to one day own my own design studio. I know I need more education in business and financing, so why not get started learning about it now? If anything, it’ll add a new tool to my utility belt during my future job hunt.

For now, my main concern is that I continue to design during my studies. Working part-time at Michael Graves Architecture & Design helps a lot with that, but I think I may start freelancing soon as well. I loved building my best friend’s brand, and I’m excited about the new work I’m doing for Help Me Excel. Continuing design will keep my portfolio updated, my brain sharp, and my heart happy. I’d never leave design for business, and I’m sure I’ll miss it during every term paper I write and every financing equation I solve. I do know one thing, though. When I’m sitting in my office in my own design firm, my future-self will thank my past-self for all of her hard work.

Graduation Invitations


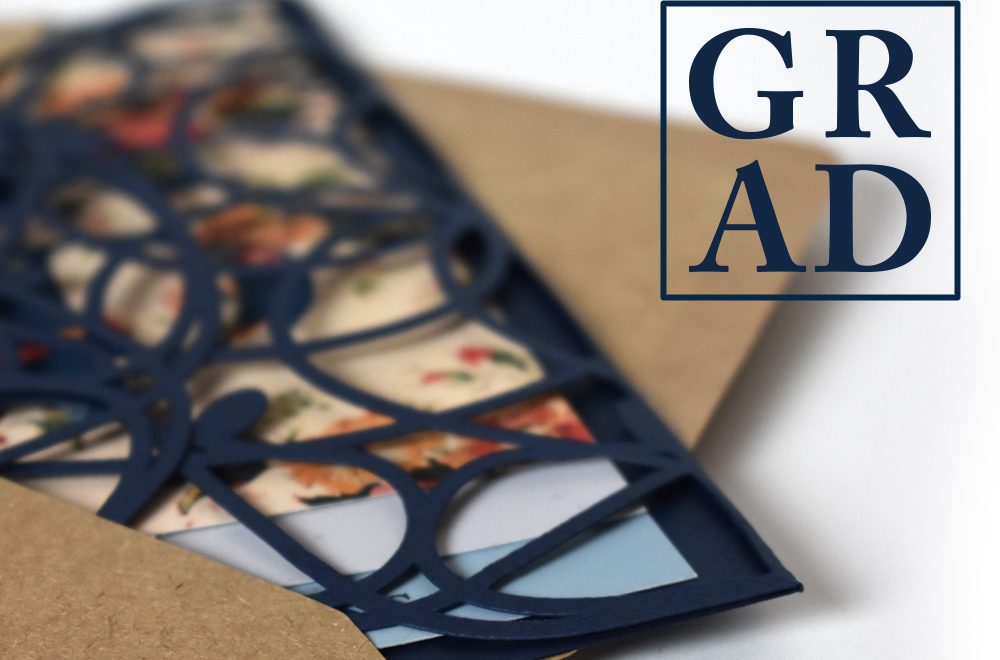
Bachelors of Science Graduation Invitations

In December I sent out my graduation invitations. The process of designing them was so odd. I’ve found it’s always hard designing for yourself. It’s so easy to over-design, and there’s always something you want to change after production finishes. In my case, I didn’t have a huge budget. I’d be comping my design and sending them out by hand with my boyfriend, Austin. At every juncture of the design process, he kept production in mind. I, however, shot for the stars and designed whatever I wanted to. I didn’t think of how much effort printing and comping would take until I ended up with a three-tiered design with an intense die cut and a staple closure. I wanted to add twine as well, but you have to know when to stop.

I worked in between classes looking online for inspiration. I knew I wanted to use a gatefold that mimicked lace, but I wasn’t entirely sure what else I wanted to add to the look and feel. My school colors are navy and goldenrod. Navy is a beautiful, elegant color, but goldenrod is harsh. If I die cut my gatefold flaps to look like lace, using goldenrod in my design would look disconnected. I was interested in using a pastel yellow to reference the color, without beating you over the head with the actual color. I found a beautiful vintage wallpaper pattern online that used pastel yellow and navy together. It was floral, which I felt was appropriate for spring, and feminine – something that felt appropriate to me.

Once I had the floral motif combined with my lace, the rest of my design decisions fell into place.

The card I was sending out had to be more than just a card. I was sending it out so early because my friends and family live on the west coast, and they needed time to book their flights and hotels. Graduation season in Philadelphia is very hectic, and you have to book in advance. Otherwise, you won’t have any options. I wanted to include information about when the ceremony is, and where to RSVP, but I also wanted to include a list of hotels and where I live in reference to my graduation events. I could fit all of this on a huge sheet of paper, but I didn’t want to custom order envelopes. I needed to stick to a standard mail size, so I felt that a tiered system would be the best way to approach this. I created a tabbed system for the card so my friends and family could navigate my system easily, and kept the tertiary map information in the back.

Production was a small nightmare.

A month prior, I bought a Cricut die cutter, and it was one of the best decisions of my life. I bought textured navy paper at Michaels and ran all of my shells through my Cricut, so I wouldn’t have to sit with my X-Acto knife for days on end. The hard part came, weirdly enough, when I was printing. My file was huge and my printer kept seizing up. I couldn’t afford to buy speckle tone paper, so I simulated it in my design as an overlaid texture. Unfortunately, this made my file size huge. I tried compressing it as a PDF, turning it off and on again, and asking it nicely, but it wouldn’t budge. I needed to comp twenty cards, and one sheet of paper took thirty minutes to finish printing. There wasn’t much I could do. I decided to place two full cards on a larger sheet of paper to cut my print time down, and I sucked it up. While everything was printing, Austin and I sat at the dining room table cutting the cards out of each sheet of paper. We had the Cricut running in the background, while we stapled each card, one at a time, over the course of five hours of steady printing.

Months later, I revisited my design to shoot it for this post. I still love it (which is a good sign), but I’d be lying if I couldn’t find one more thing I want to change. I guess that’s just the struggle of a graphic designer. Luckily for me, I graduate in two weeks, all twenty invitations have already arrived at their location, and there’s nothing I can do about it. That’s the beauty of a deadline.

My Co-Op Experience

During the Fall of my Junior year, I began my Co-Op at Michael Graves Architecture & Design (MGA&D). I’d worked all summer to get my license and lease a car in time for my first day of work. Continue reading